mVoice Blog
Expert VoIP advice and information for Aussie businesses
looking to upgrade to something better.
HOW TO … Configure an IVR
May 2, 2016 By Craig Lawrence No Comment
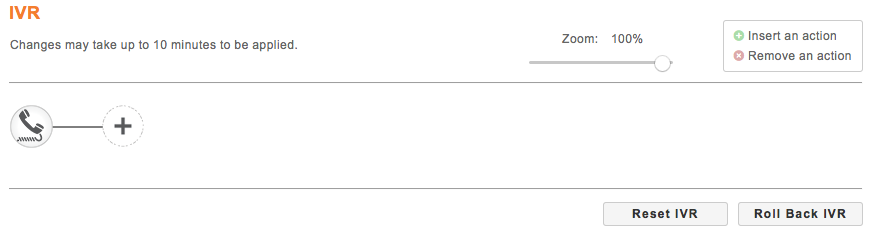
You can configure the IVR settings for your own services, or those of your customers from your mVoice portal.
By default no IVR will be setup and you will be presented with a blank template as shown;

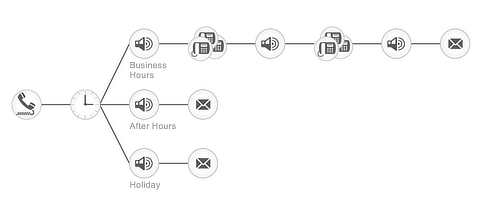
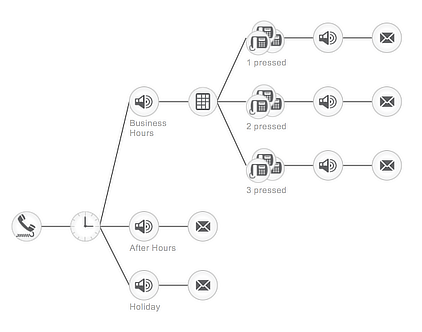
There are three pre-configured options available which you can choose from by selecting ‘Reset IVR’;
Basic – Incoming calls made within Business hours will play a welcome message, then ring a predetermined call group, if unanswered after a set time will play a message and ring those (Or different) phones again, followed by a missed call message and directed to leave a voicemail.
Intermediate – Adds an input prompt to direct the call to a group specified in your recording.
And Advanced – Adds a reassurance message while attempting to contact the selected group before attempting a fail-over group if unanswered.
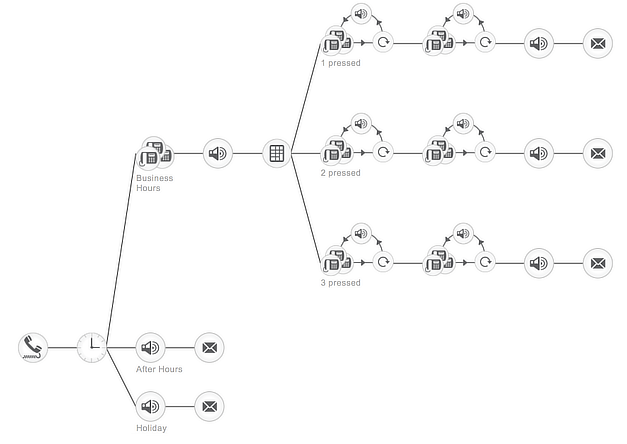
You can see that from the start point the process to configure the call flow is simply a step-by-step addition of actions, but it can result in something quite complex.
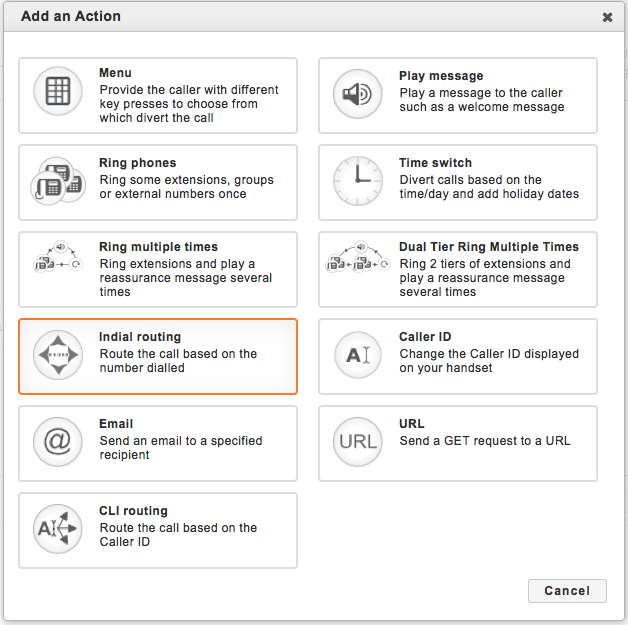
There are a variety of actions that should allow for flexibility and cater to changing customer needs;
The first action should usually be the Time Switch, this will allow you to set your regular business hours. Following the Intermediate template, clicking on the Time Switch will present you with this configuration panel;
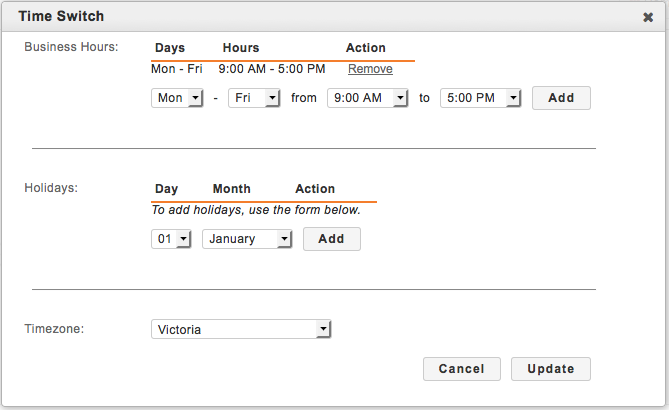
From this you can see that call made within the 9-5 window will be routed to the next action, Play Message (For example: “Thank you for calling XYZ, for Accounts please press 1, for Support please press 2…”) and calls outside this time will be directed to another recording that will, for example, advise them of trading hours and allow for a voicemail recording.
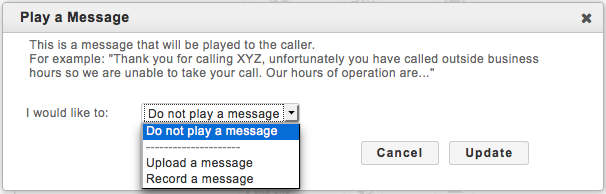
You will need to record or upload a pre-existing message to be played.
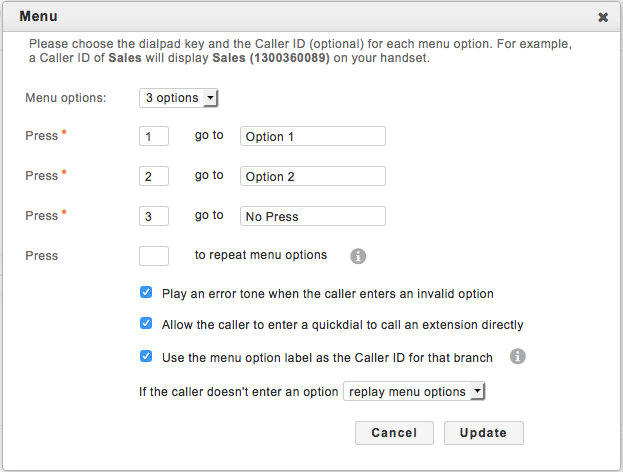
The message will be followed by the Menu action for the caller to select the department they wish to be directed to based on the recorded message;
Beyond the menu, you will need to designate call groups for the customer extensions.
For example, you can add or remove numbers from a call group by simply moving them left to right as below;
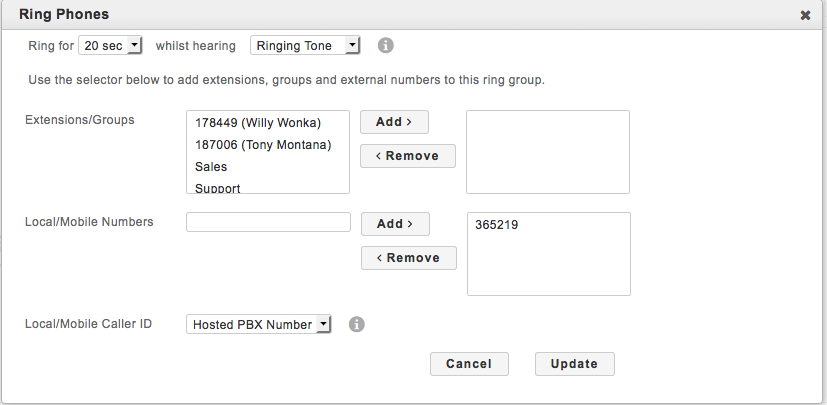
The numbers and groups available will depend on those pre-existing on the Customer account.
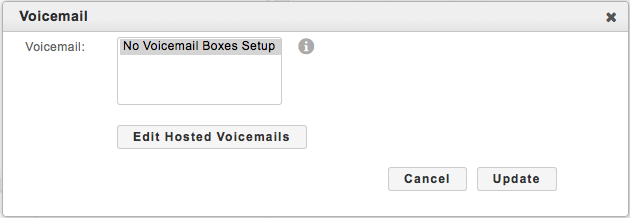
Following on, if the call goes unanswered the caller will be played a further message (For example “The person you have called is unavailable, Please leave a message after the tone”) and any message recorded will be forwarded to a designated mailbox;
As noted on the front page, it does take some time for changes to take effect. So mistakes can be rectified by using the Roll Back IVR option that will let you reverse changes to a saved configuration from an earlier day.
![]()
About the Author
About the Author
mVoice is a leading Australian internet telecommunications provider that supplies VOIP products to both small and enterprise businesses.
Social Share


There was an error submitting your question